Zapier Integration: How to connect Onlive with any of Zapier's 1500 apps
With Onlive, you have the ability to connect your account to any one of Zapier's 1500 apps and here we talk "how"!

Mark
Last Update 4 jaar geleden
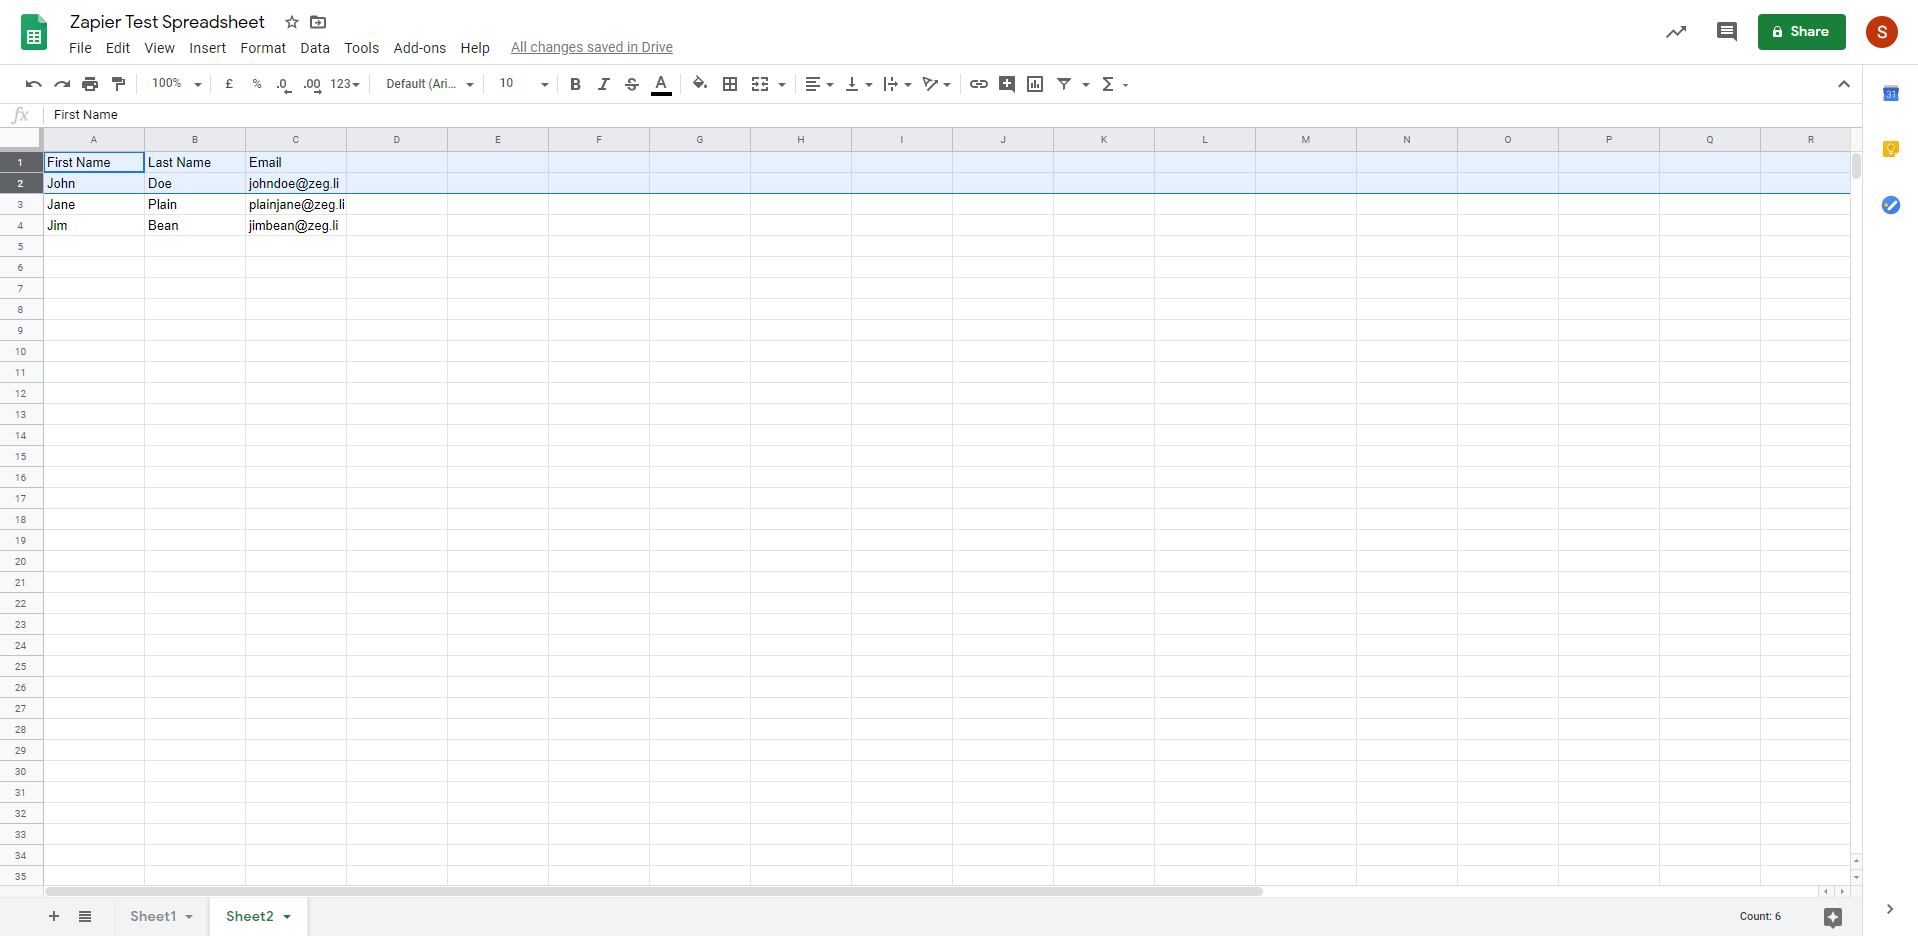
In this example we talk you through integrating Onlive with Google Sheets (via Zapier) however this process can be followed for any app you want to integrate with Onlive via Zapier.
Step 1: Create A New Zap
In Zapier, click on 'Make a Zap' in the left menu. Feel free to give this zap a name.
Step 2: Connect Google Sheets
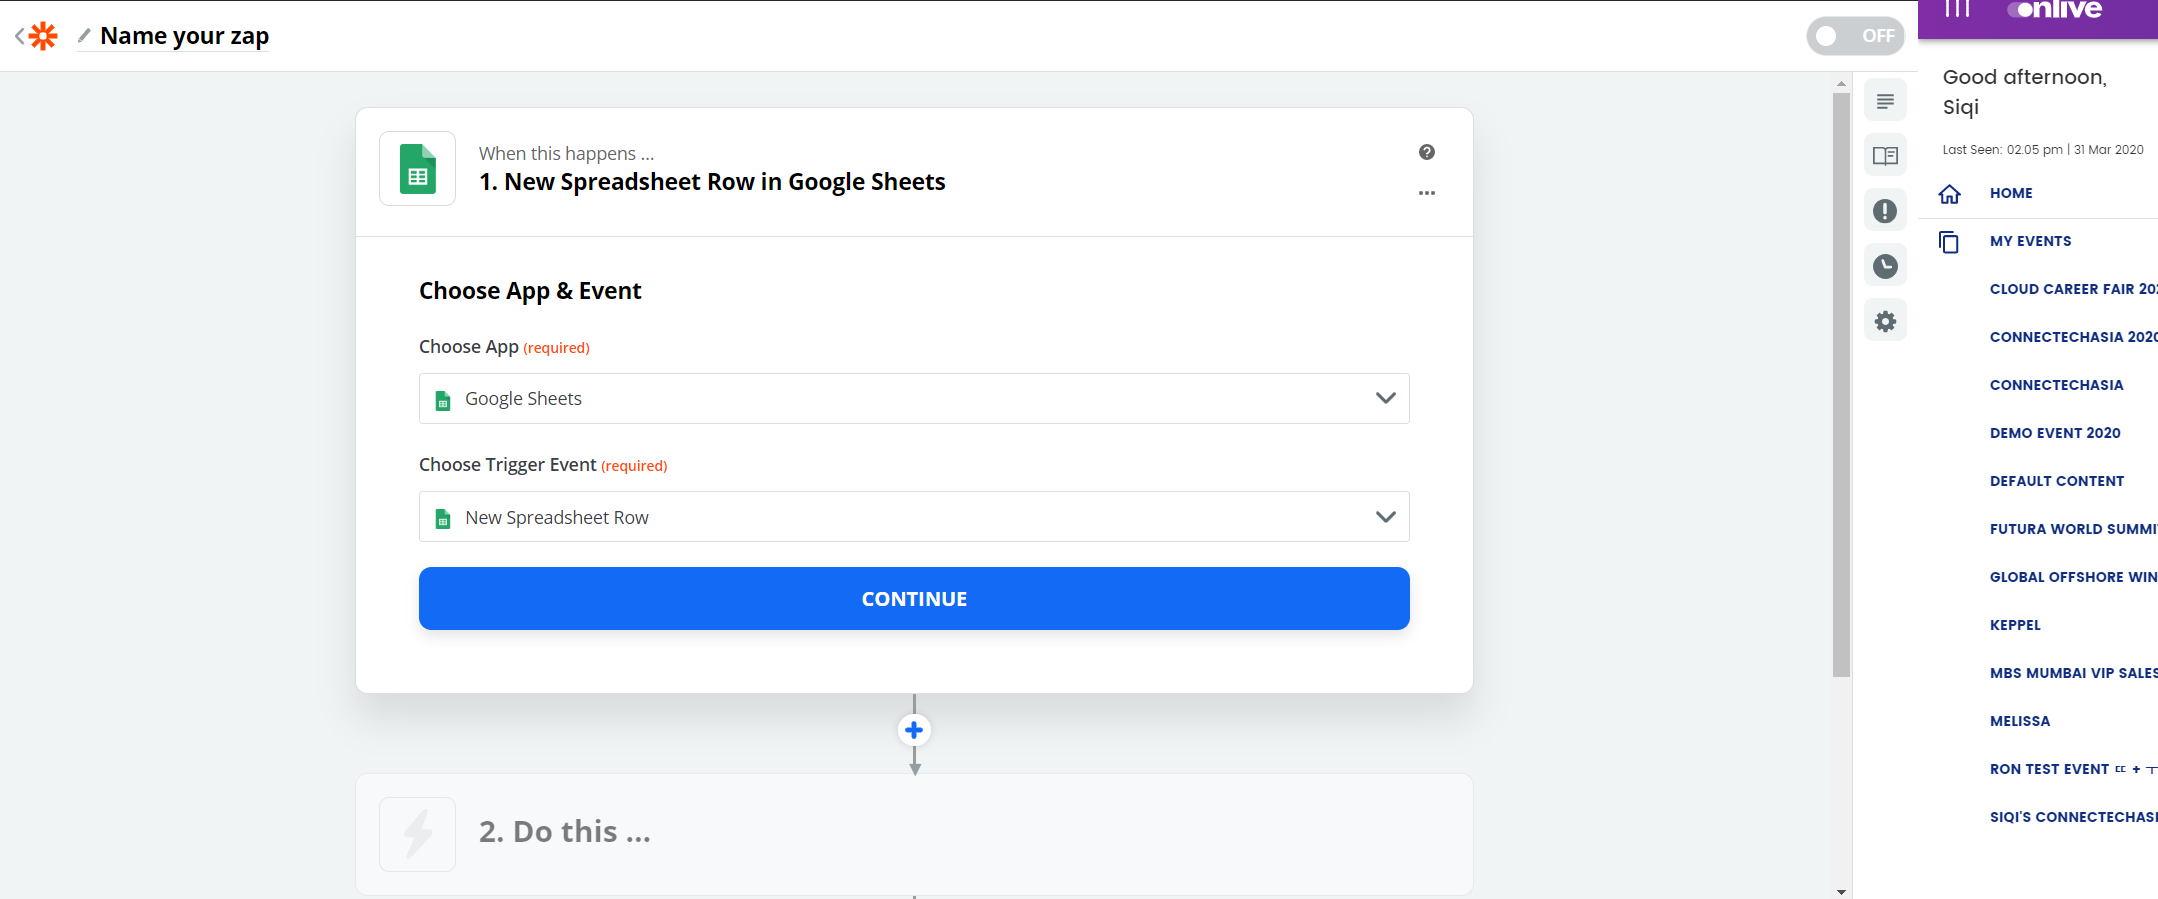
Choose App & Event
Under 'Choose App', select Google Sheets. Select a Trigger Event of your choice. Create Spreadsheet Row is selected here. Click Continue to proceed.
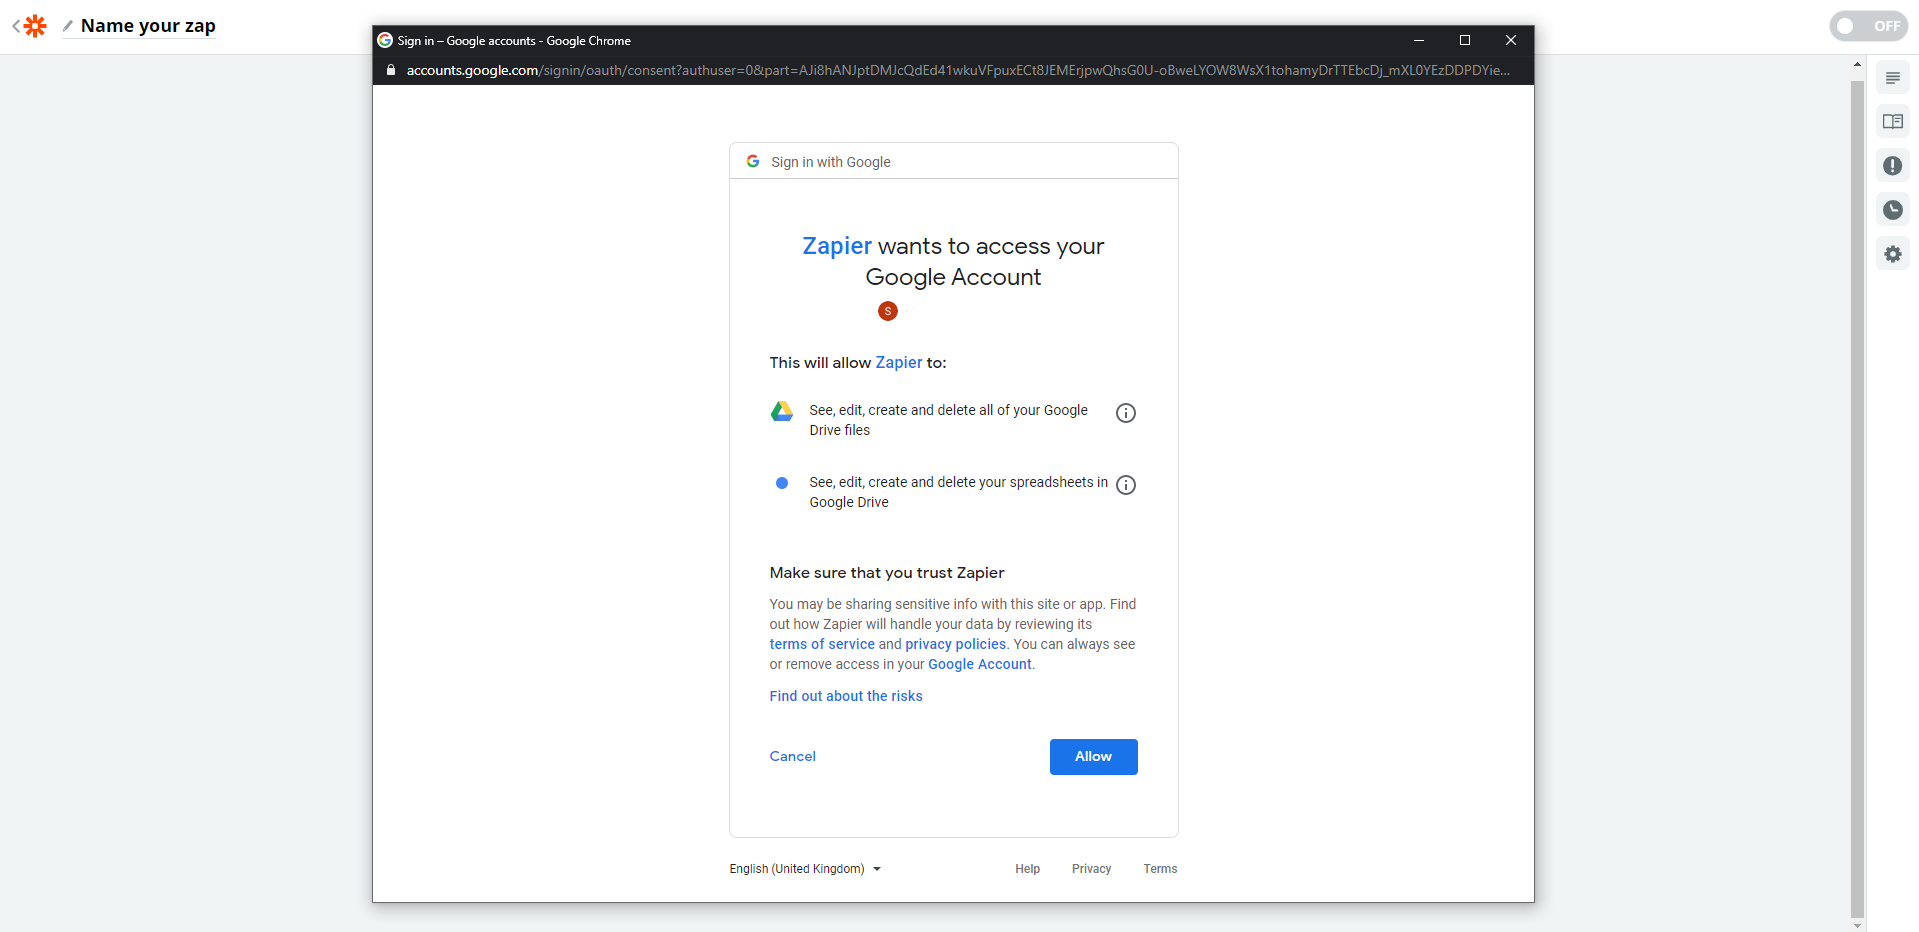
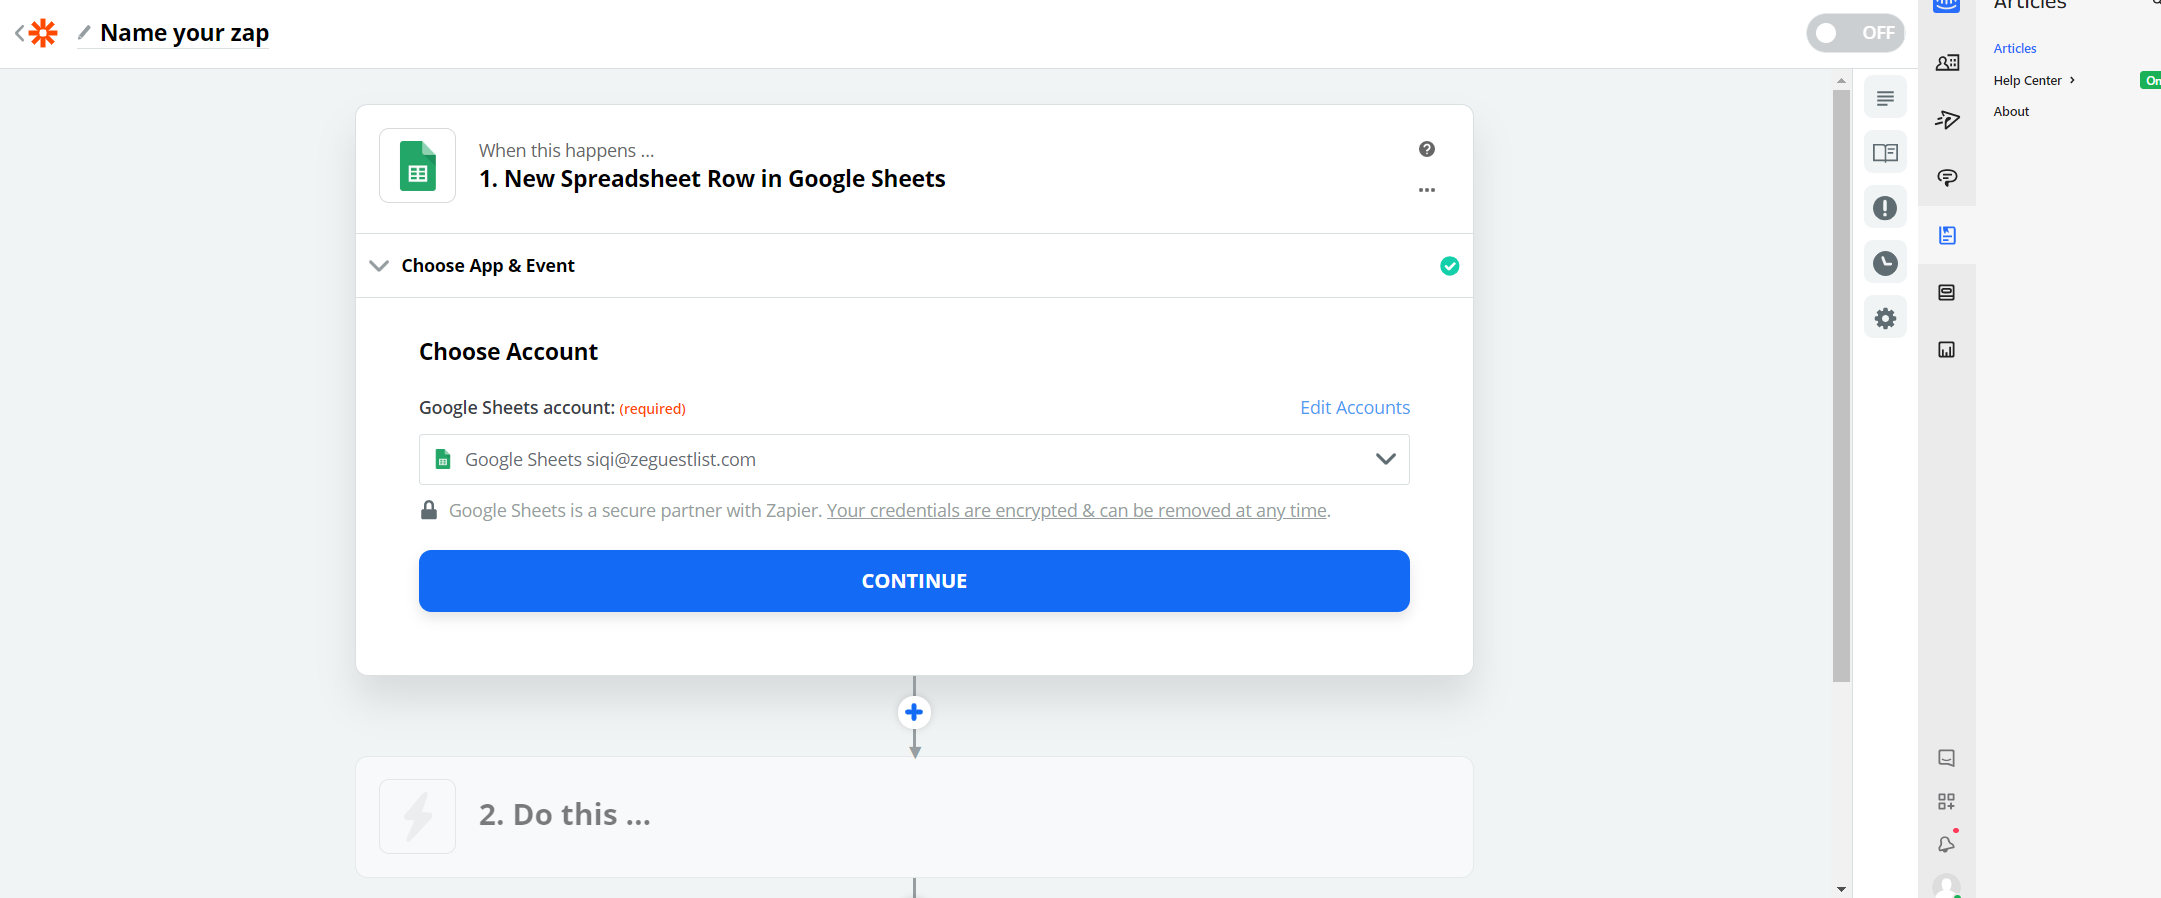
Choose Account
Sign in to your Google Account to link it to Zapier. You will need to grant Zapier permissions to access your Google Account. If you have previously already connected your Drive to Zapier, simply make the selection from the dropdown.
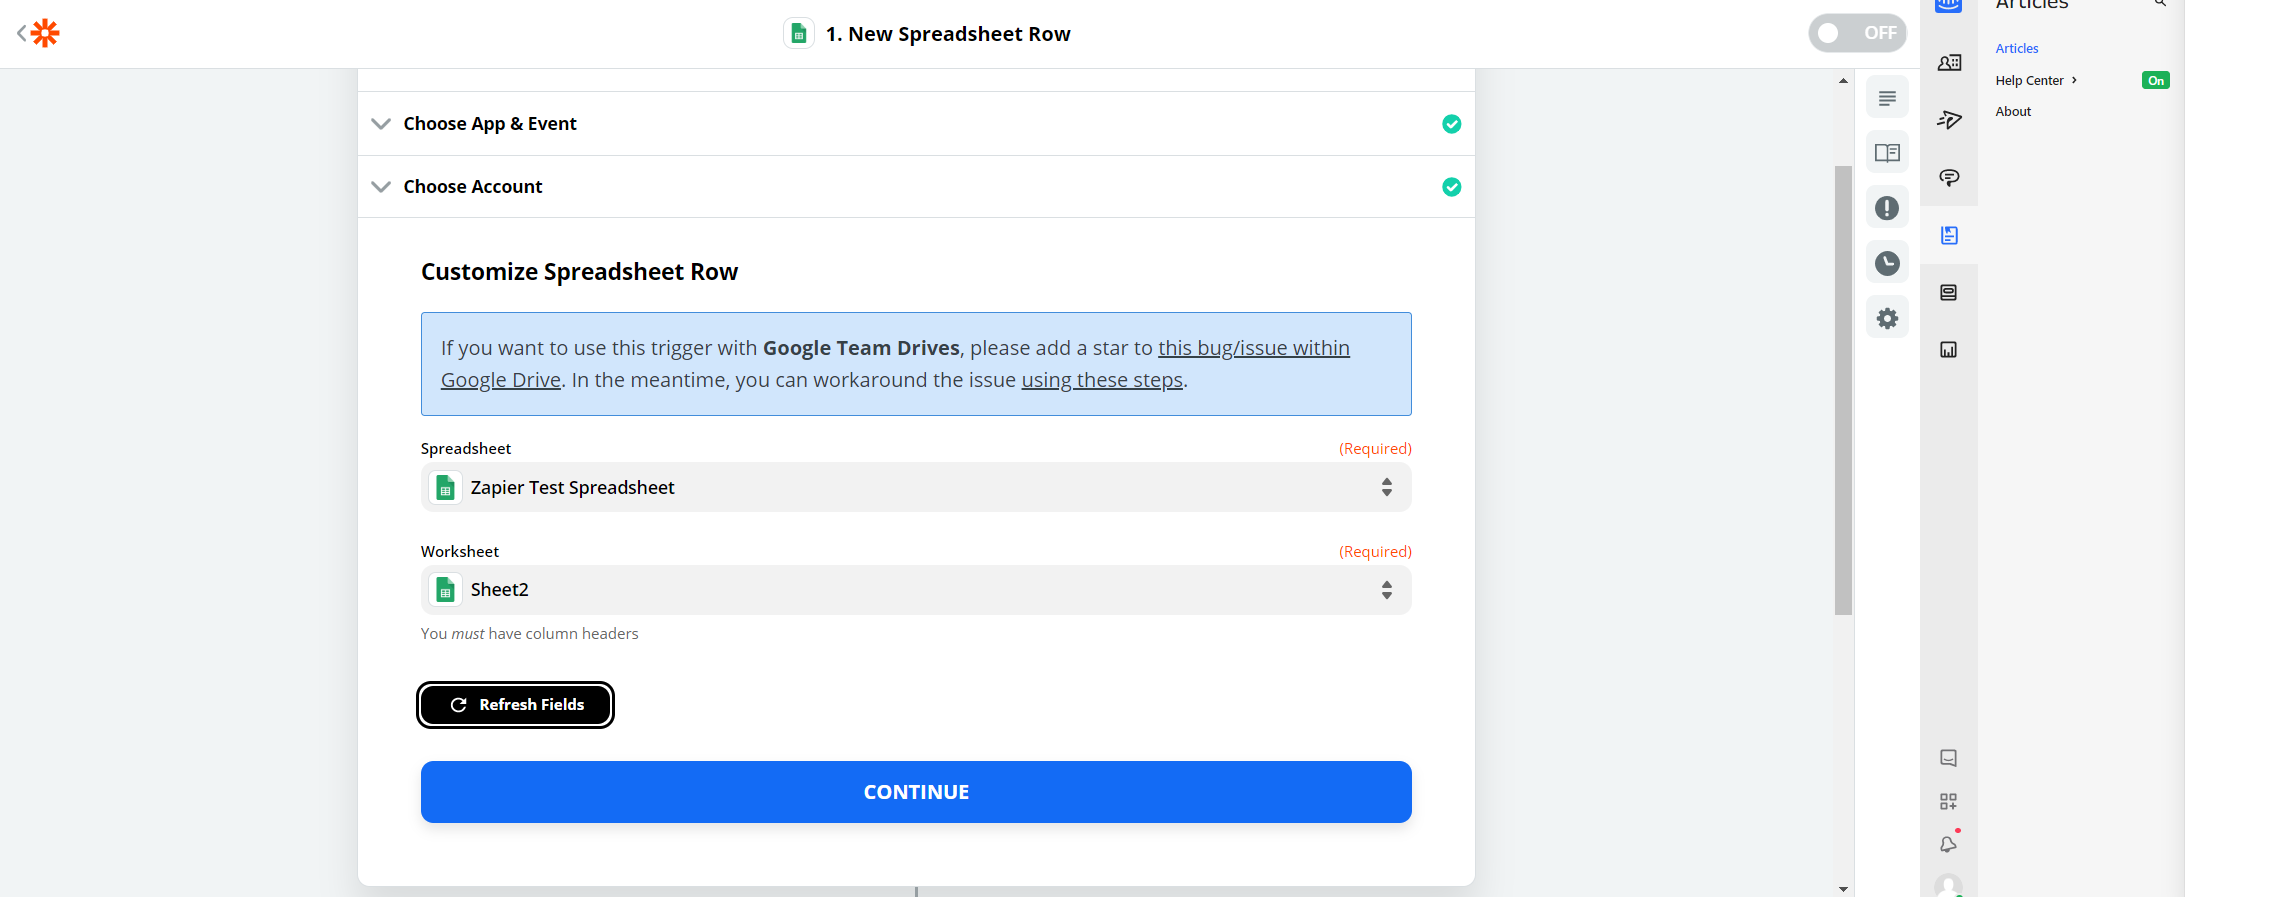
Customize Spreadsheet Row
Select the spreadsheet and worksheet you would like to use and continue. Remember to have headers and some sample guests ready in your spreadsheet for testing purposes.
Find Data
Click 'Test & Review' to get a sample of guests within the selected spreadsheet.
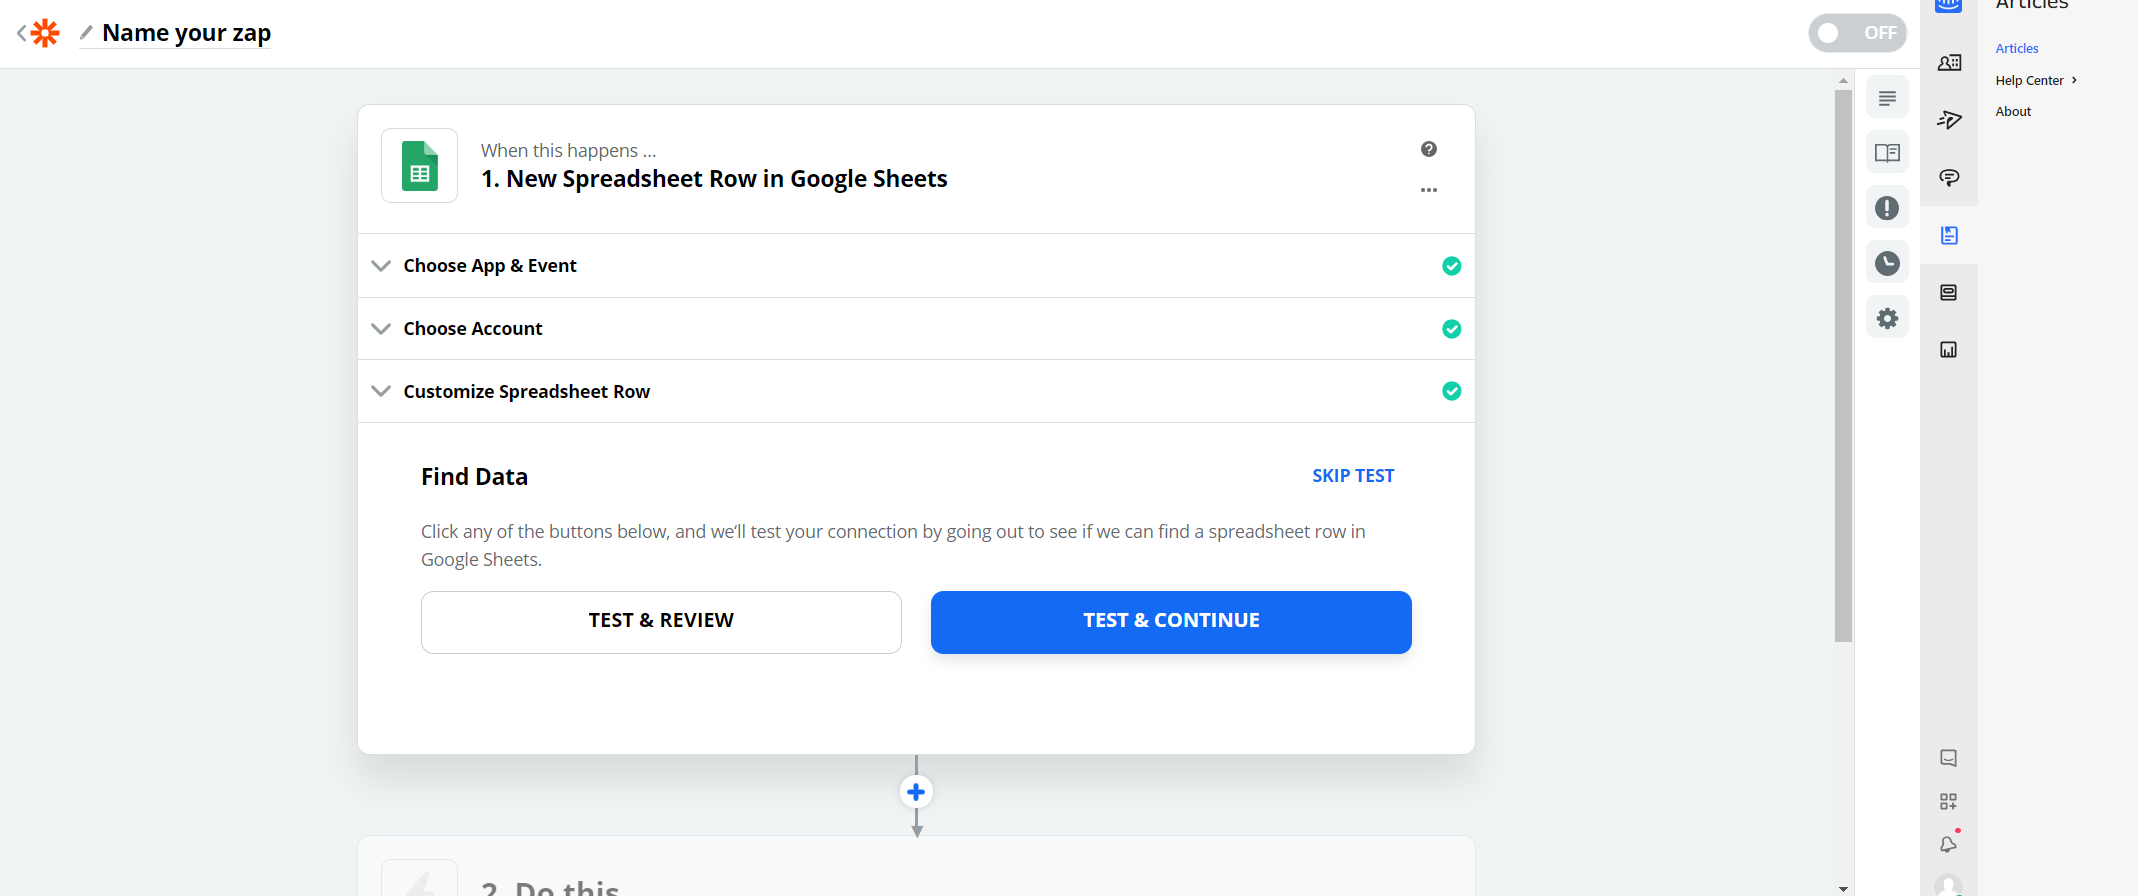
Click on any guest to check if they are found in your spreadsheet. You may also click on 'Get More Samples' if you wish. Once you are happy with your sample, select one of them and click 'Done Editing'.
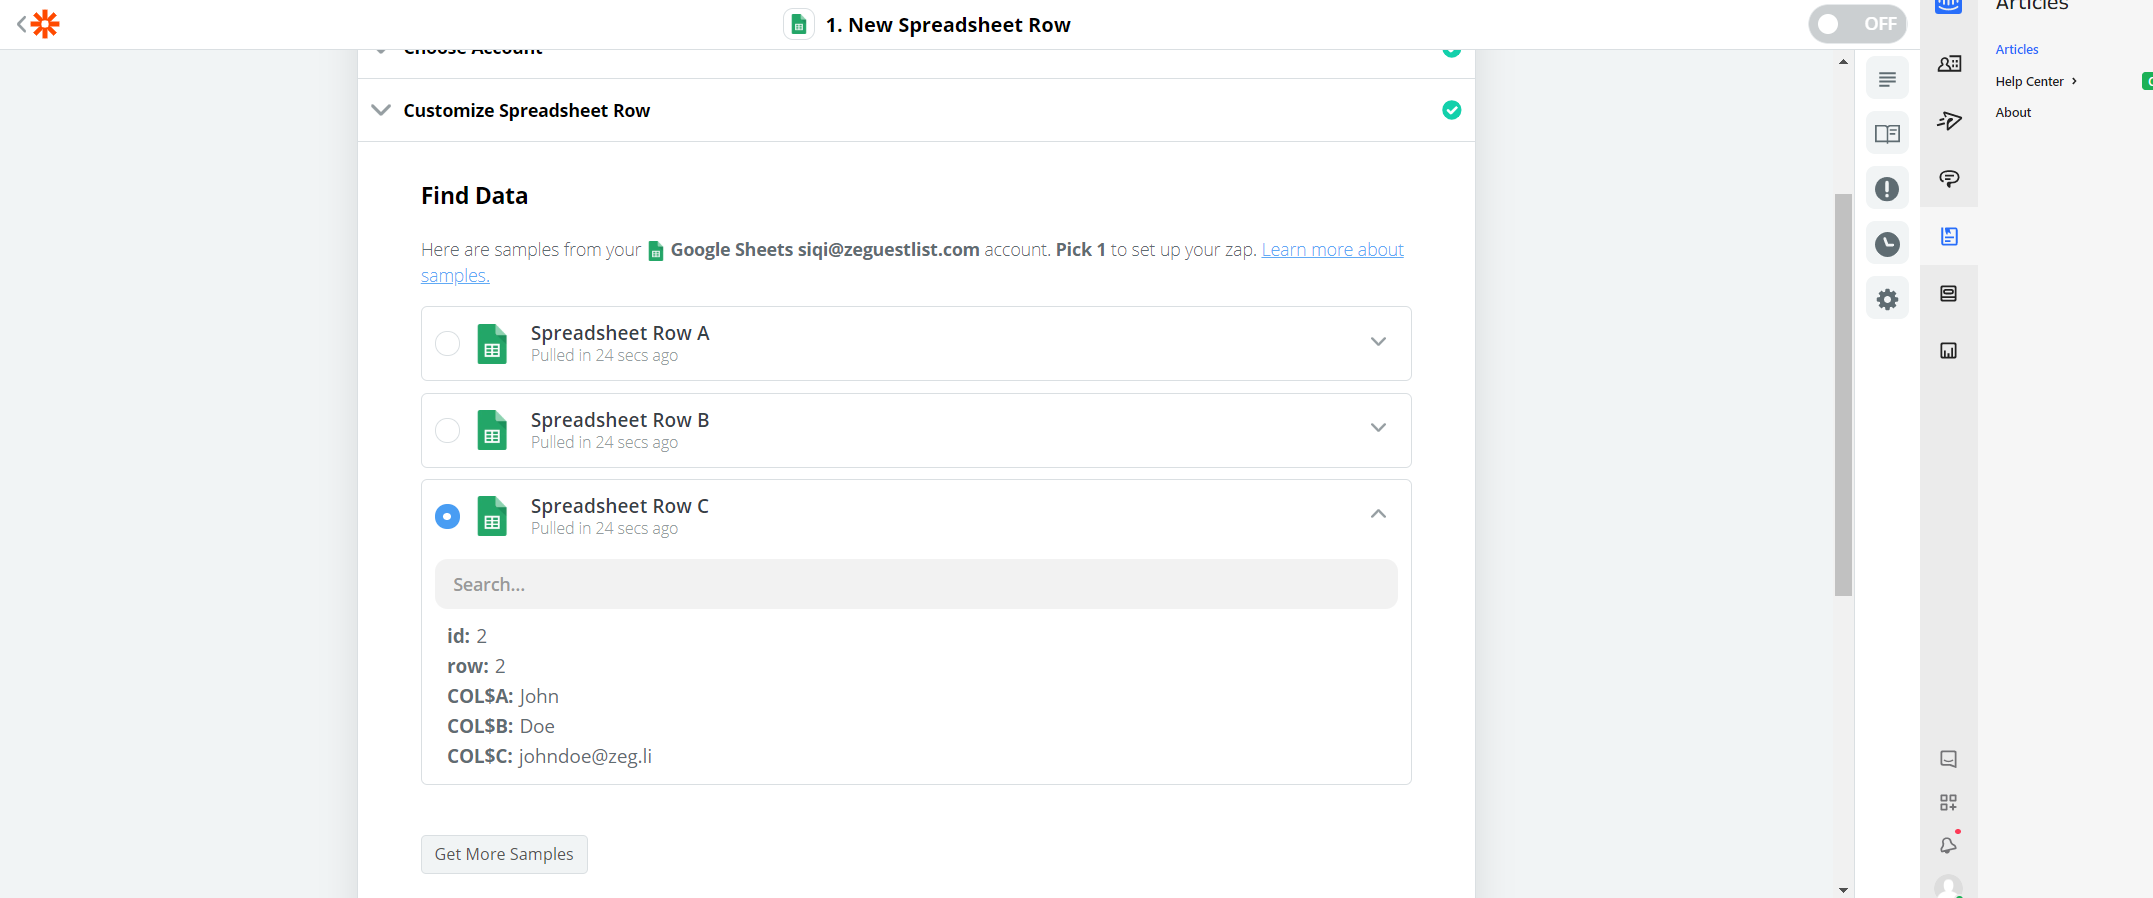
Step 3: Connect Onlive
Choose App & Event
Under Choose App, search for and select Onlive. Select Create Guest as the Action Event and continue.
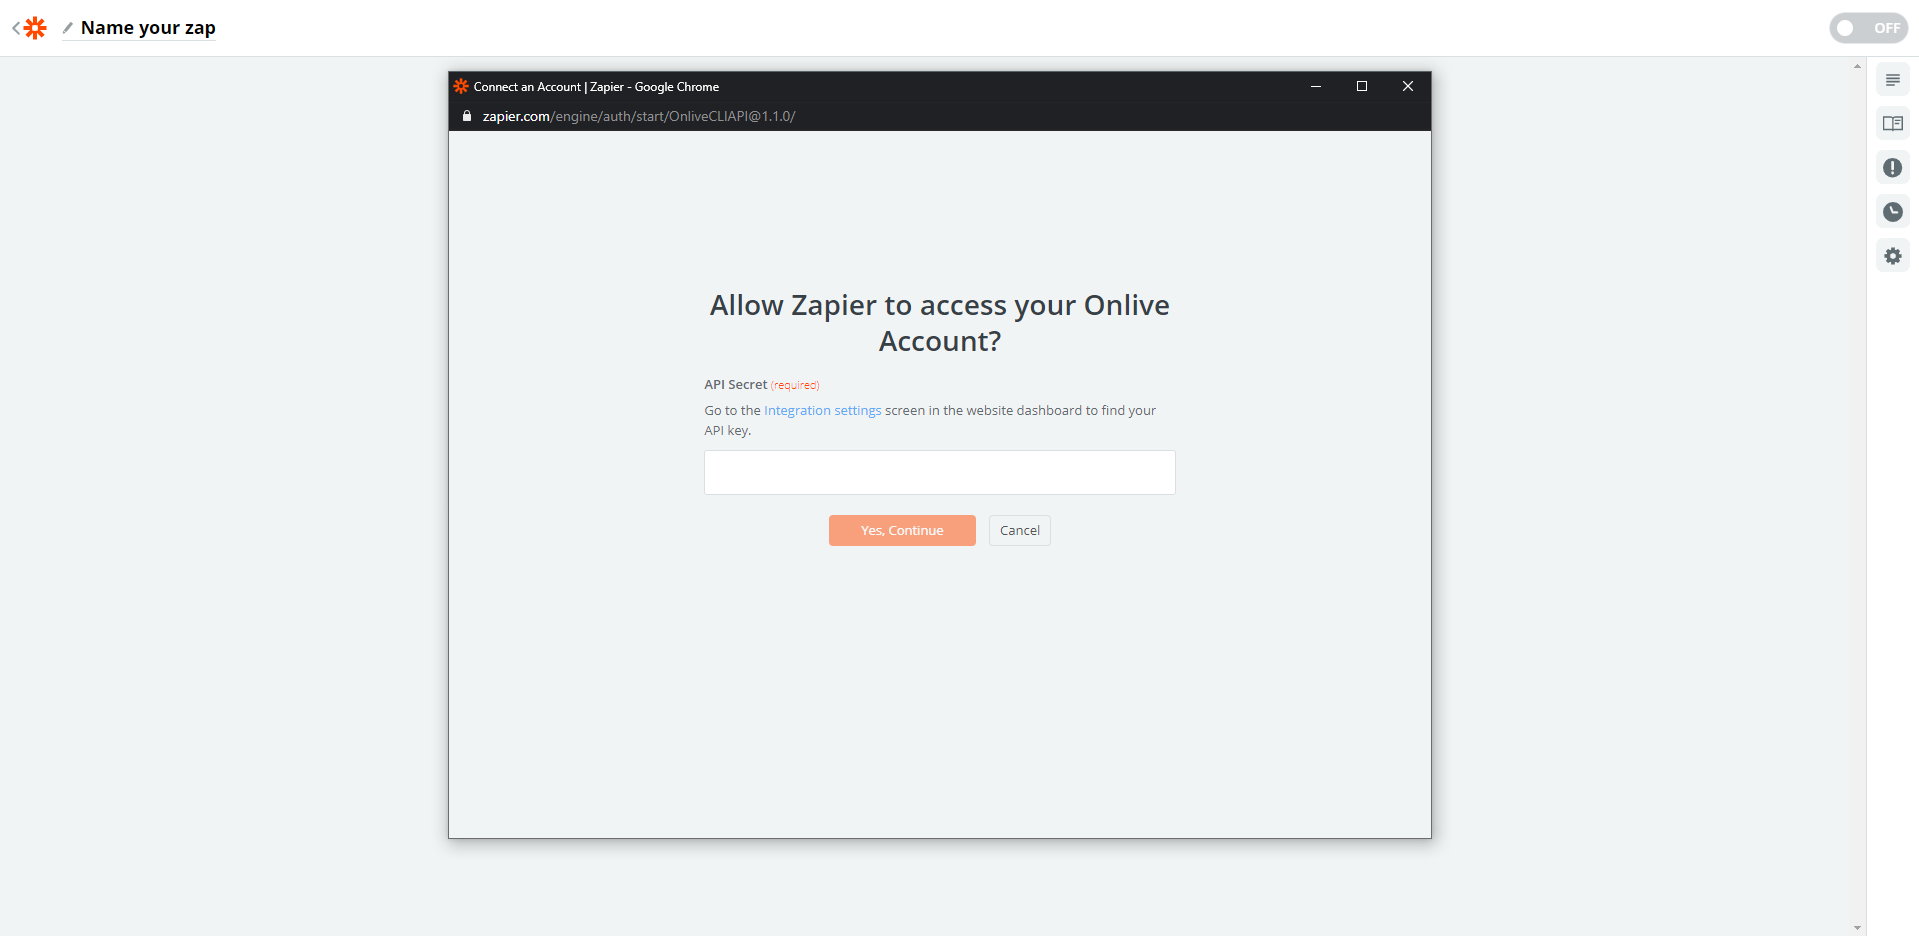
Choose Account
If you've have connected Zapier to Onlive before, simply select the account and continue. Otherwise, click on the 'Sign in to Onlive' button to open up the popup shown below:
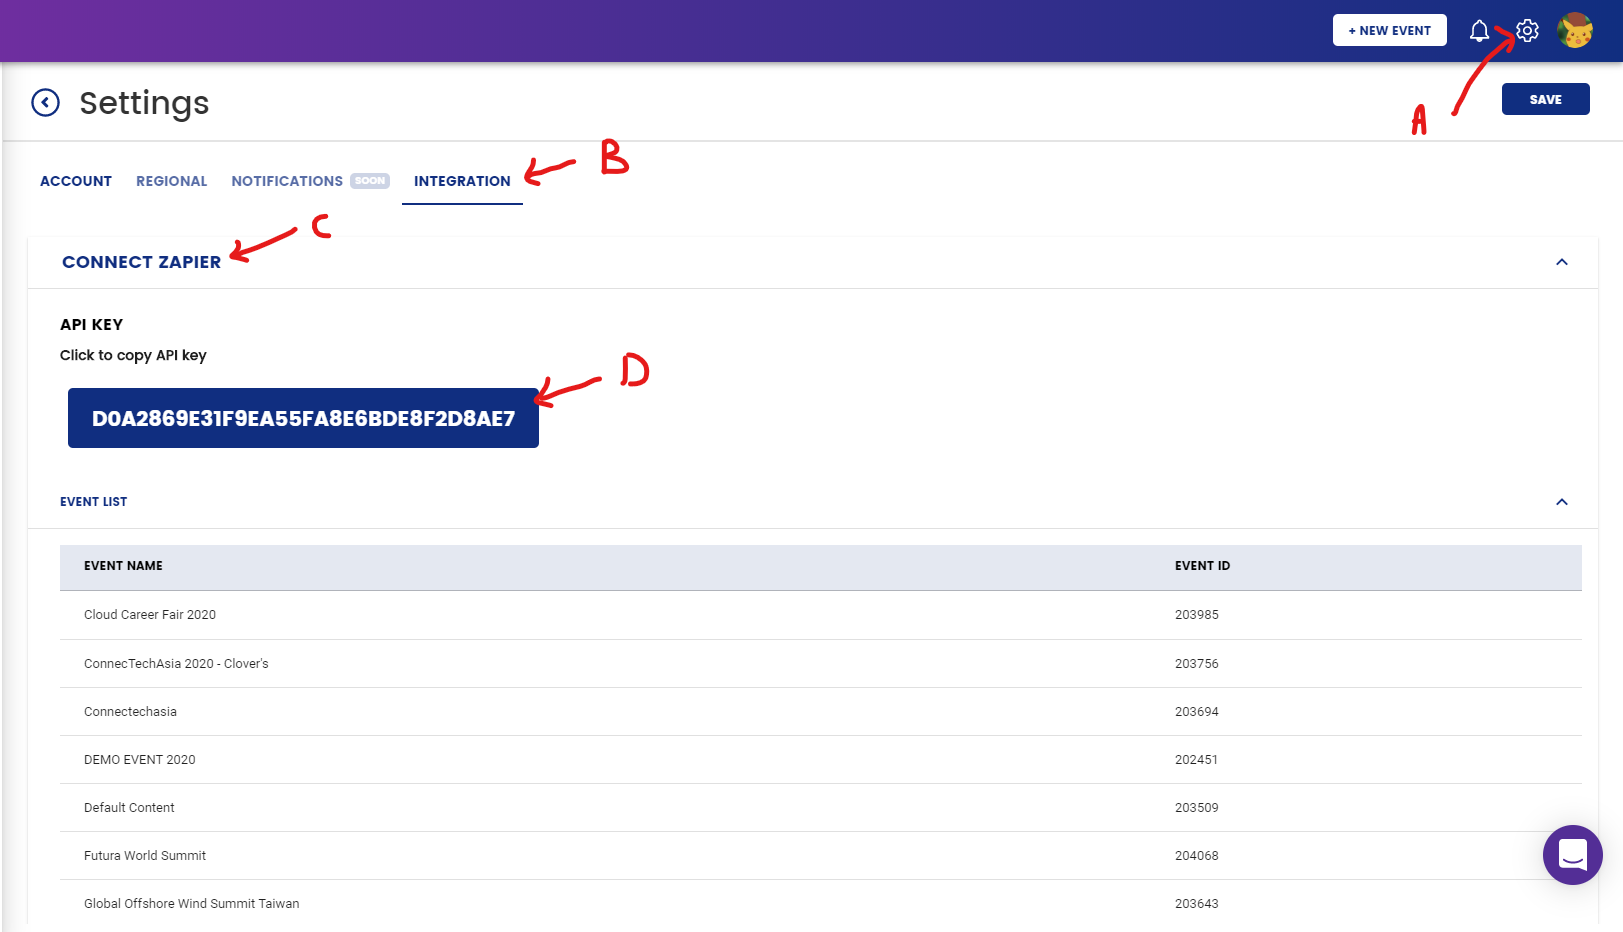
In a separate tab or window, sign into your Onlive dashboard and:
A. Click on the settings icon on the top bar
B. In the settings page, select Integration
C. Click on Connect Zapier to expand the card
D. Copy the API key by clicking it
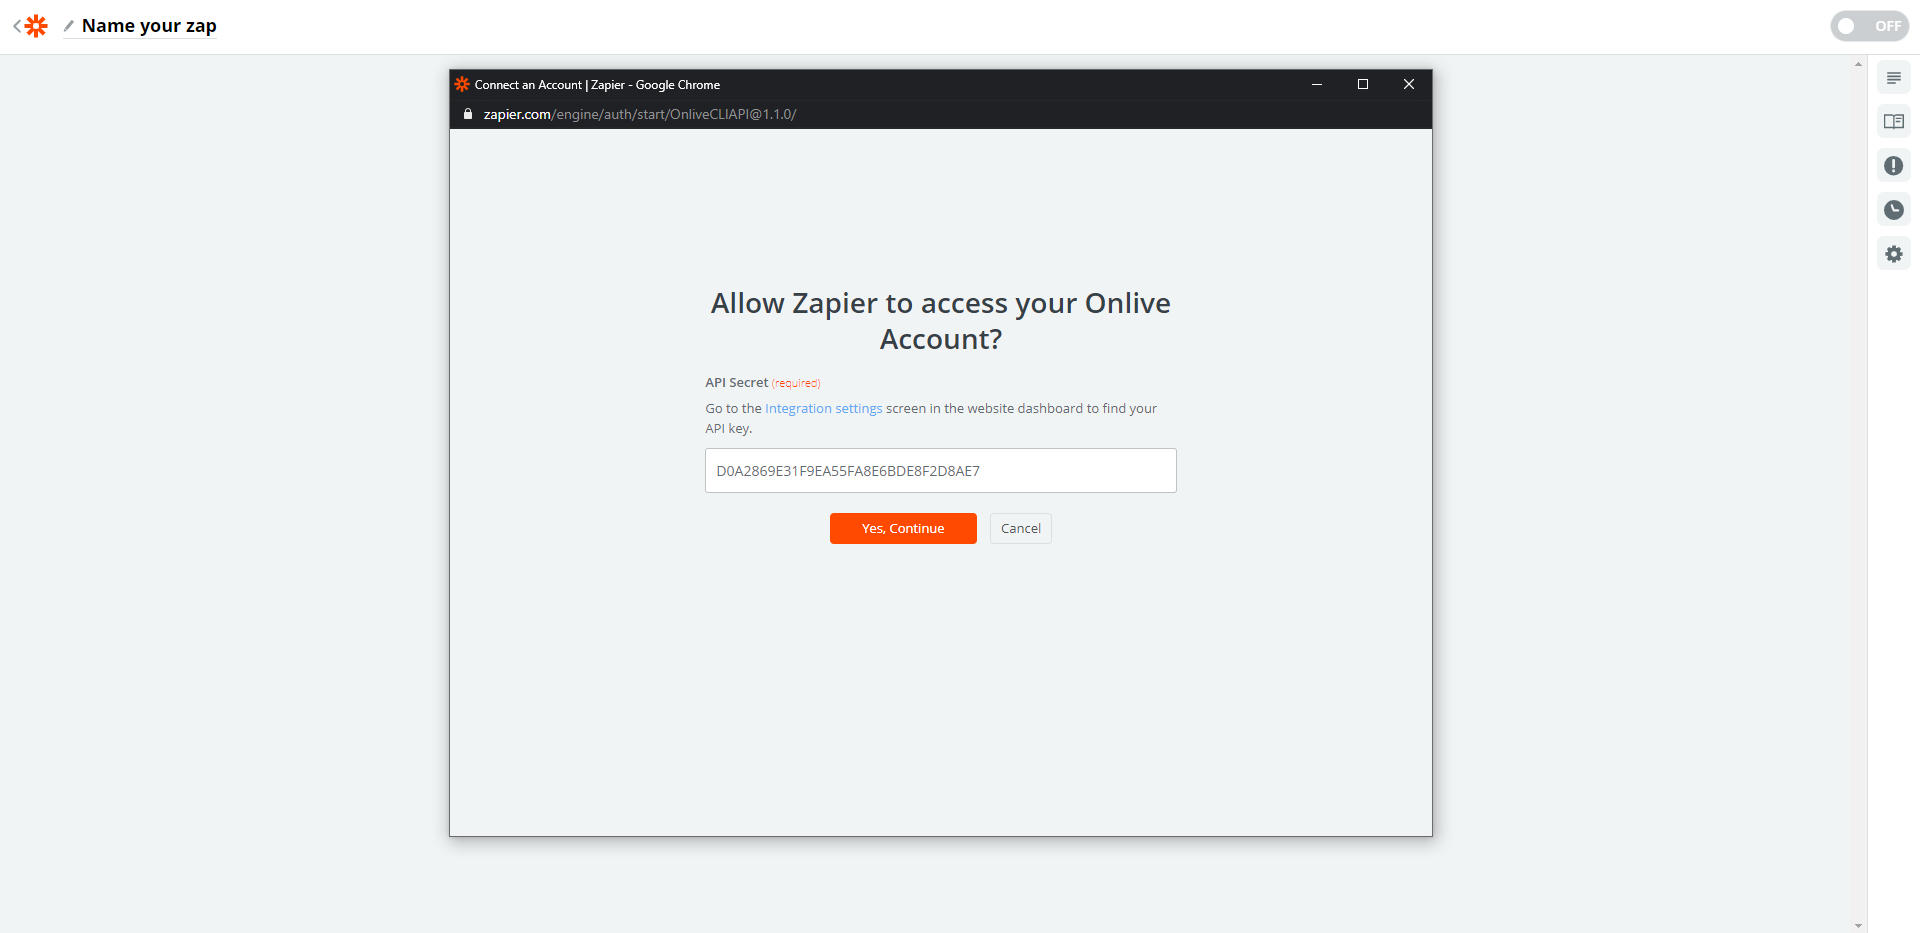
F. Paste the API key into the Zapier popup and continue

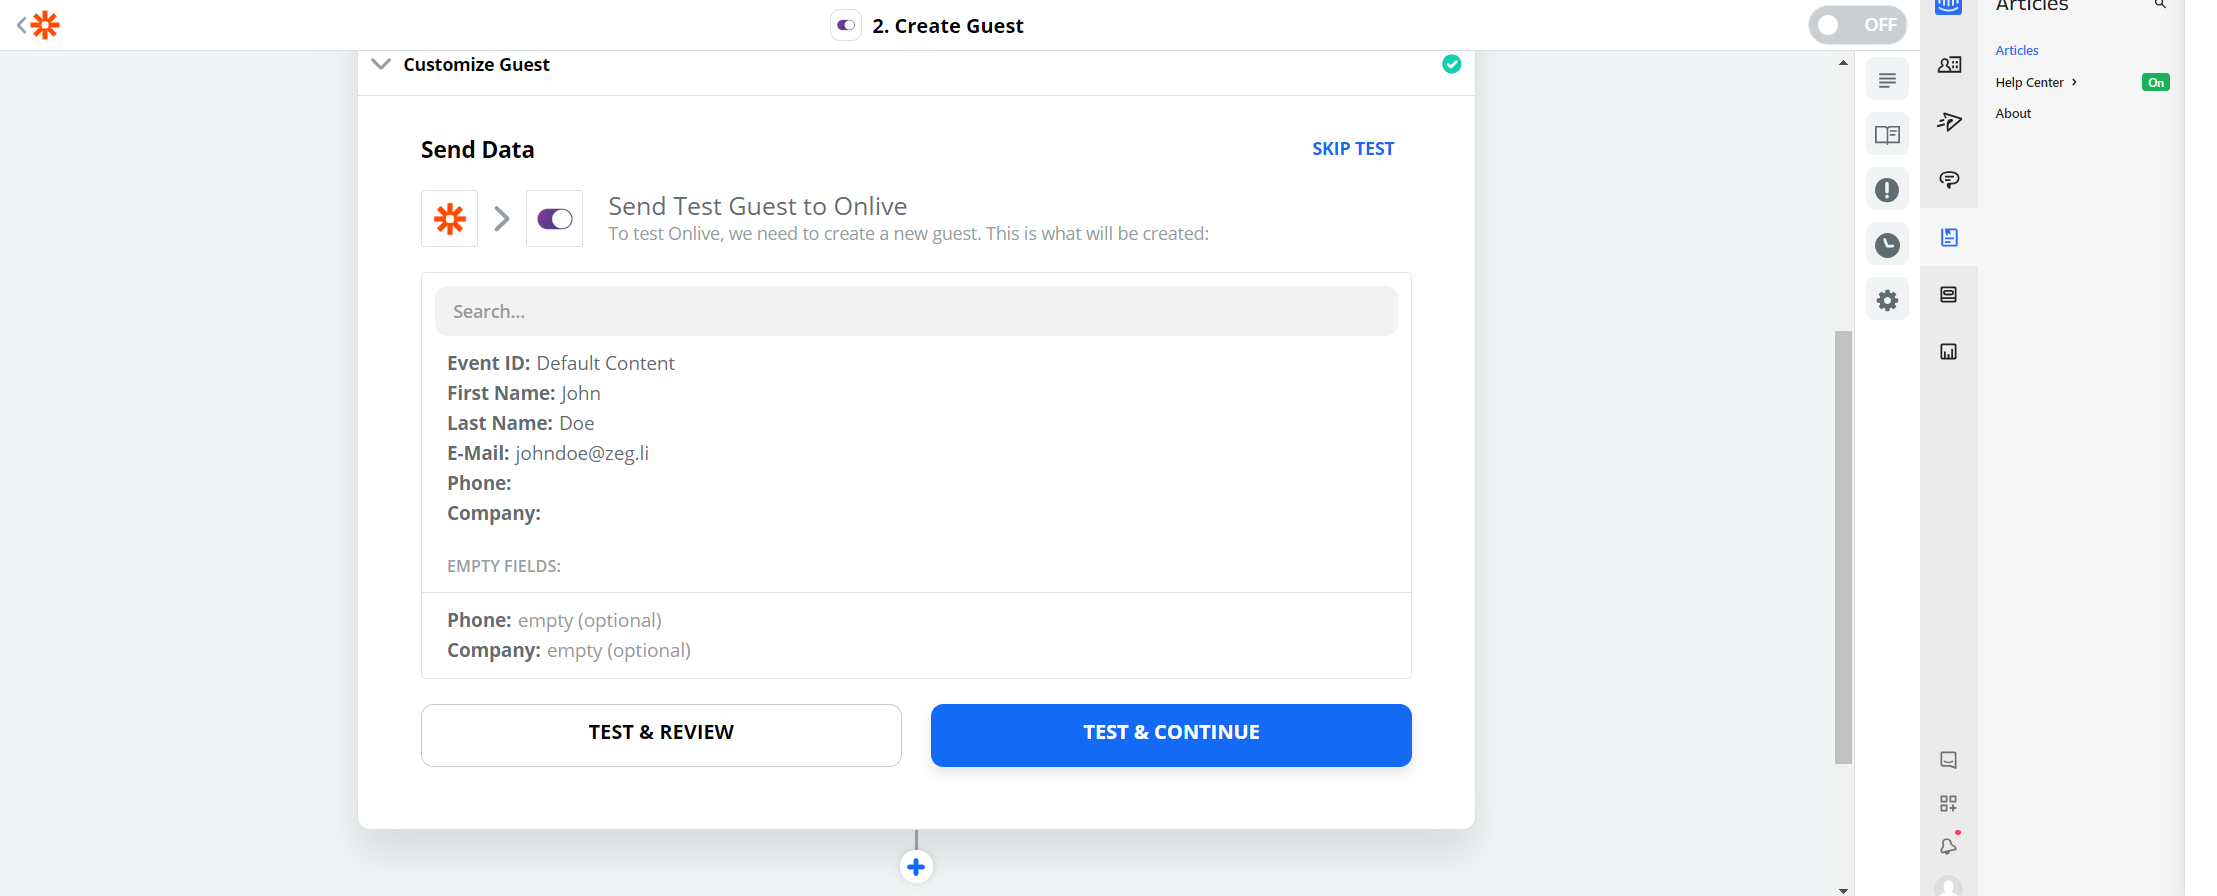
Customize Guest
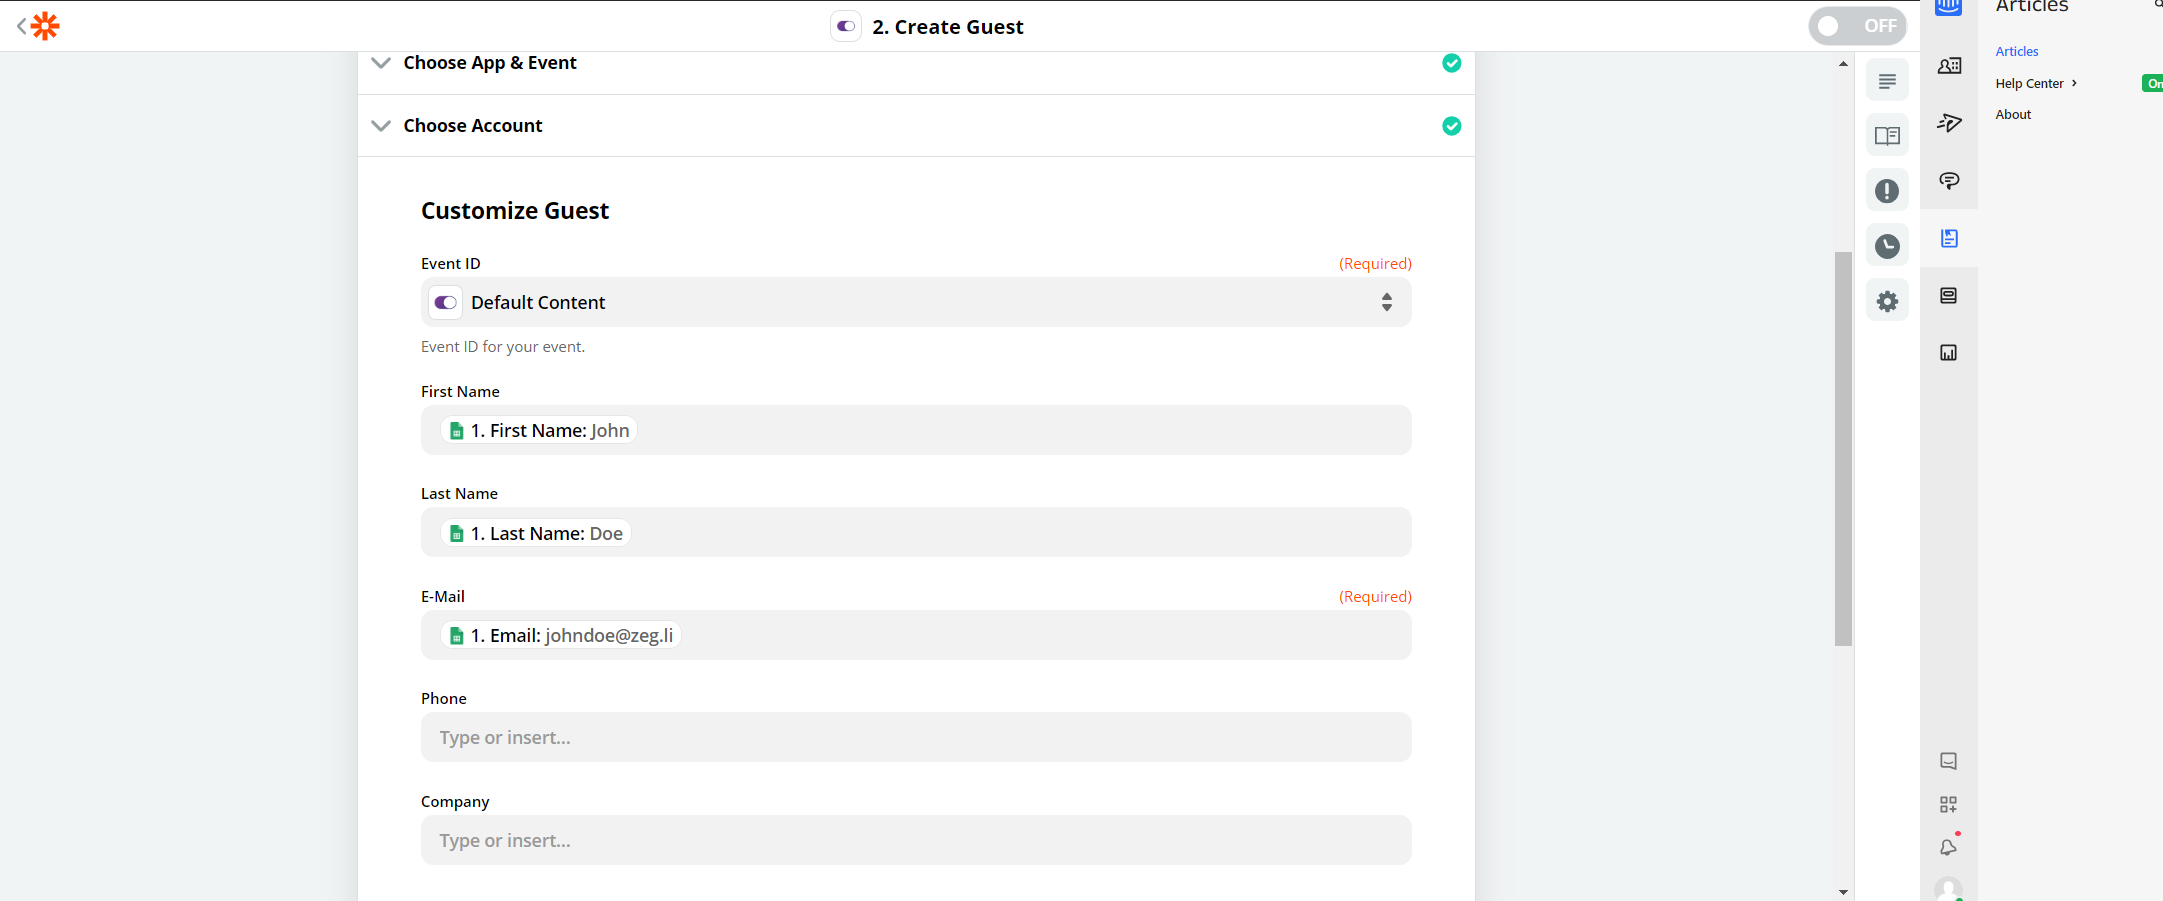
Select the desired Event ID from the dropdown menu. You may also use the Event ID listed in Onlive to help in your search. Do note that only events with a single ticket will show in Zapier!
After which, simply complete the list and pair up the data fetched with your headers. Click continue to proceed.
Send Data
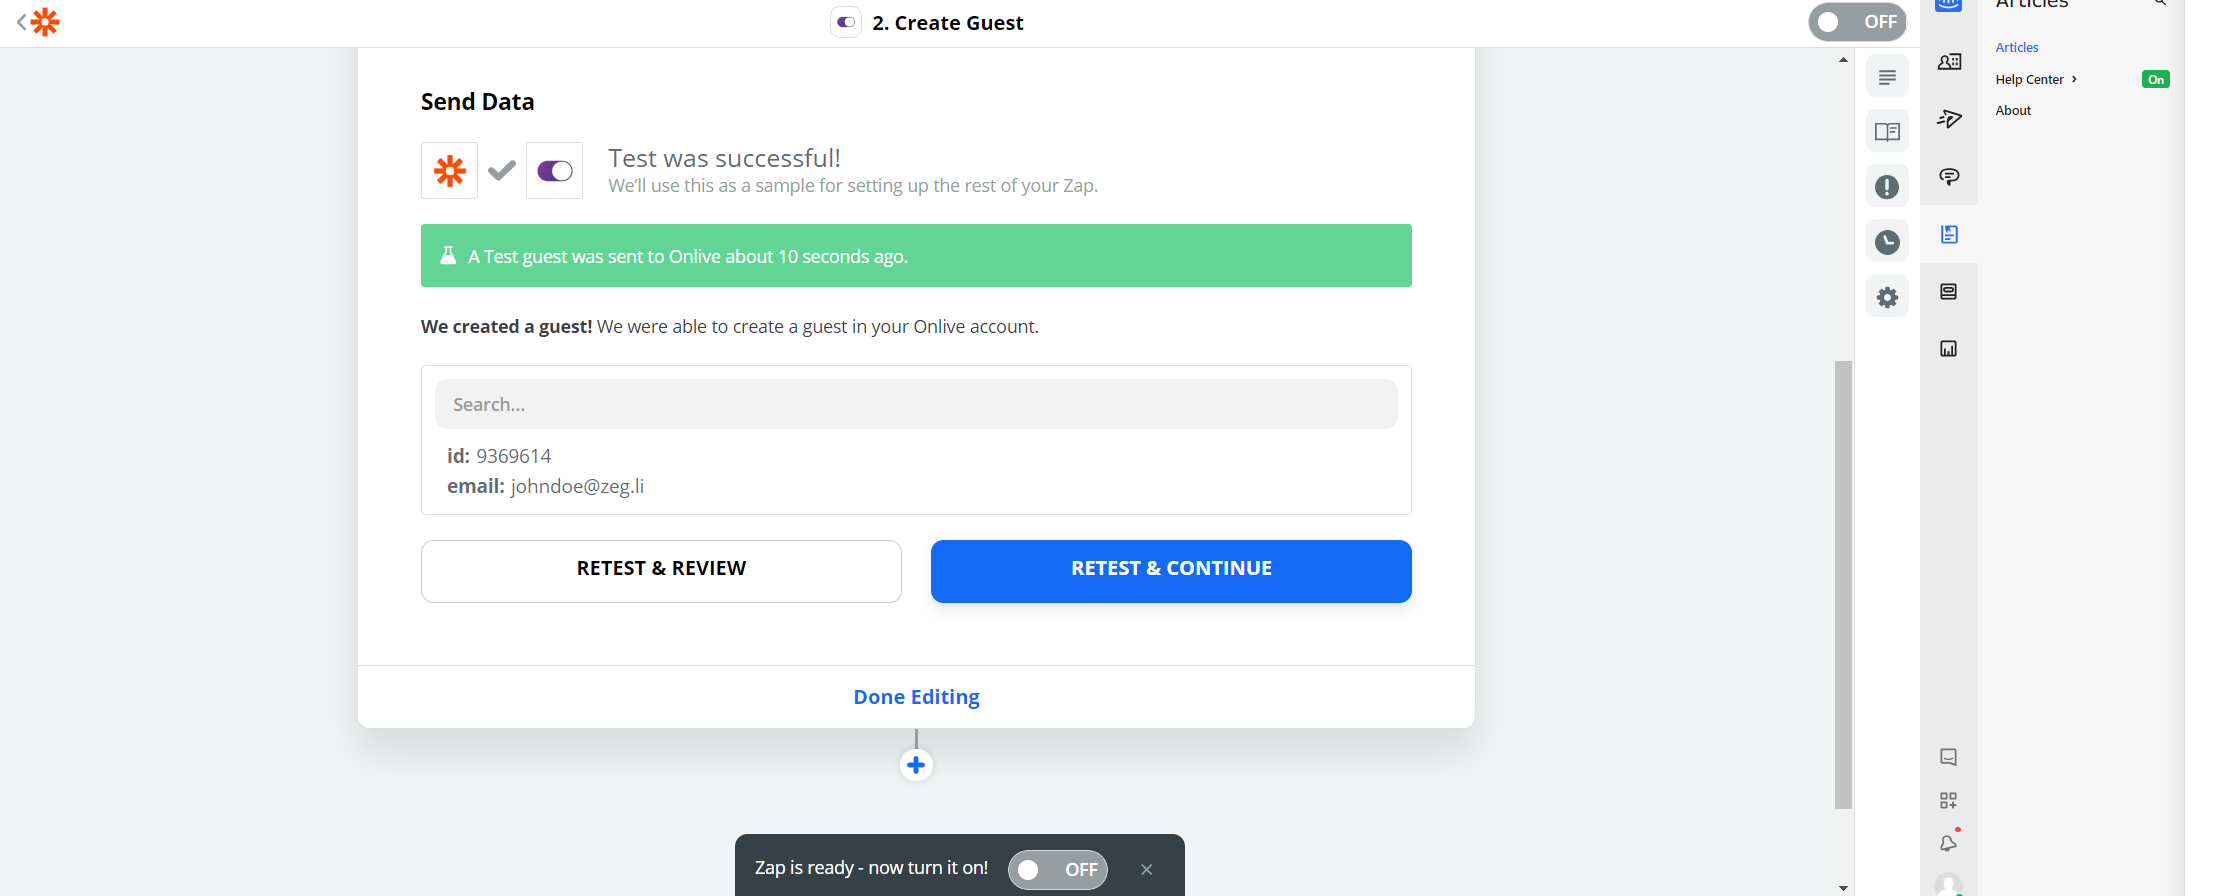
Click 'Test & Review' to try sending a zap using the sample guest that you have selected before.
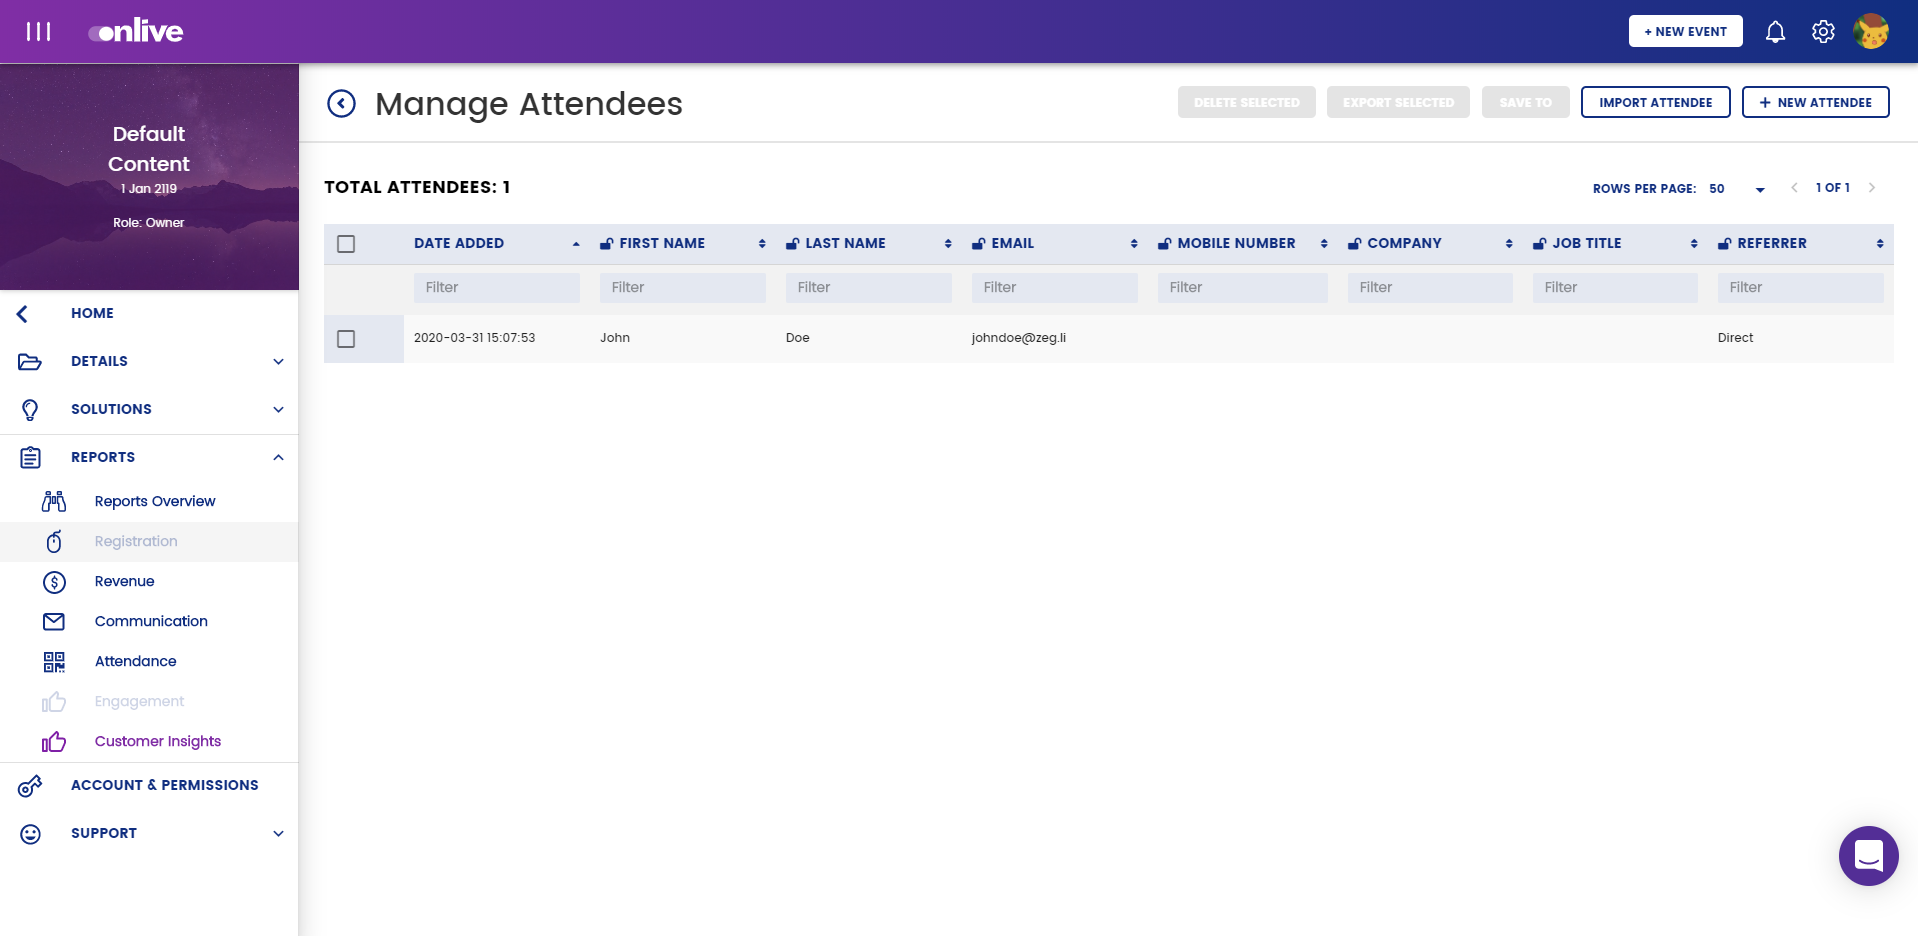
In your Onlive dashboard, head over to your event's attendee reports to check that it has received the sample guest data. You can navigate to your attendee reports via: Your Event > Reports > Registration > Attendee Report > Master
Click 'Done Editing' back in Zapier once that has been confirmed. Turn on/off your zap by toggling the switch below!
Please note that this method only works for events with one ticket at the moment. Depending on your Zapier plan, it might also take 5-15 minutes for the attendees to be added.