Customizing Success Messages
Find out how to personalize the success messages shown to your guests upon check-in

Mark
Last Update 4 years ago
Our Attendance Checker app allows you to personalize the success message shown to your guests and include any additional information such as table number, etc.
Once you are in the correct Event Workspace, click 'Solutions' in your Event Menu, followed by 'Attendance Checker'. In the Attendance Checker Control Panel, you'll see a 'Design' widget. Here, you can customize your check in app with ease.
Success Message (Event Check-In)
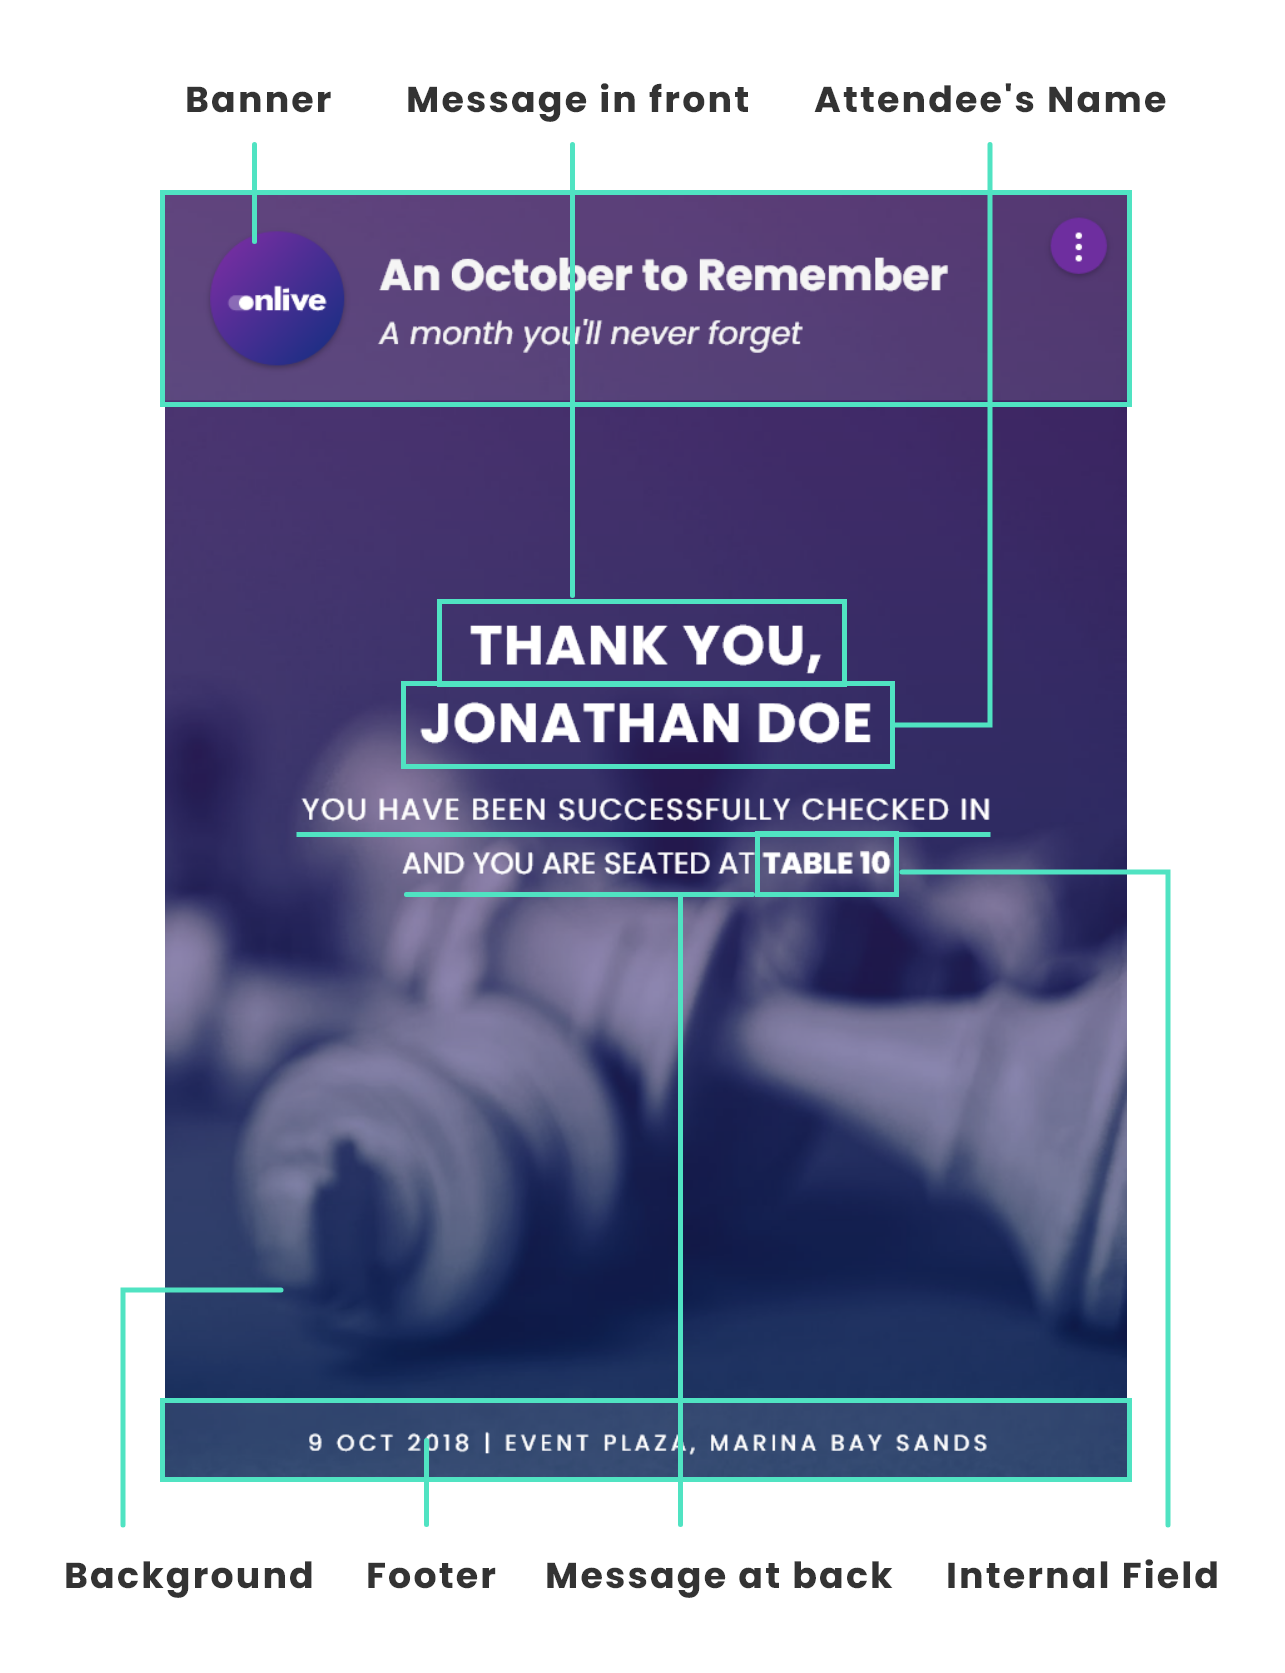
The first thing that you'll be able to change is the success message that your guests will see. There are some nifty modifications that you can make in order to make your check-in experience more useful. You can include fields from your guest's registration in their success message if you need to inform them or remind them of something. For example, you can display custom fields like table numbers to inform them of where they need to be seated.
Step 1: Selecting Name Format
Using the radio buttons, select how you would like your guests' names to appear.
Step 2: Adding A Message
You can choose to add a message in front of or behind your guests' names, or both. Simple check the relevant box and input your message. For example:
- FRONT: Welcome, [First_Name]
- BACK: [First_Name], welcome!
- BOTH: Hello [First_Name], it's great to see you!
Messages are shown in bold here for illustrative purposes only. The actual messages will be formatted the same way as your guests' names.
Step 3: Adding An Internal Field (Optional)
An Internal Field is the additional column that you can add into your Attendee Reports. It allows you to add additional information that was not included in the registration forms for each guest. Common examples of internal fields are Group Names, Table Numbers, Comments, etc. Find out how to add Internal Fields to your Attendee Reports here.
You can add and select an Internal Field to display to your guests upon check-in.
Step 4: Adding A Custom Field (Optional)
A Custom Field is any field added to the Form(s) on your Registration Website that is not a Standard Field. You can read more about it here. You can add and select a Custom Field to be displayed to your guests upon check-in.
Step 5: Sending Success SMSes
You might also want to have your success message sent to your guests as SMSes upon check in so that they have this information on hand as well. You can do so by toggling on the switch "Send an SMS Upon Successful Check-In"
Do note that the estimated cost of one SMS is displayed below the toggle. It is estimated based on the number of characters used in your message. The final cost might differ from the estimated cost as guests' names are dynamic data which differs from guest to guest.
Success Message (Session Check-In, Master)
If you have session check-in enabled, you can also customize the success message for each session. This widget here allows you to set a default master to be shown for all sessions. The settings in here are the same as those described above.
You can also create unique success messages for each session! Find out how by reading this article.