Setting Up The Attendance Checker
Find out how to download and setup the check-in app, and to connect it to your printer

Mark
Last Update 4 jaar geleden
Okay, so it's the day of your event and you are ready to put the Attendance Checker to good use. Here's how to get your check-in app prepared and ready to go!
Step 1: Download the App
Alright, first things first! Download the app on the device(s) you would like to use as the check-in kiosk. Do note that the app is currently only compatible on iPads.
You can find the link here:
Android version coming soon
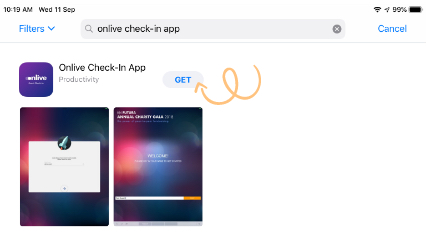
Alternatively, you could just look it up in the App Store! Search for 'Onlive Check-In App' and you should see it right away. Of course, just go ahead and hit that GET button to download it. It's free!
Step 2: Logging In
When you have successfully downloaded the app, you'll see a login page when you first open it. Please note that the credentials here are not the same credentials as your main Onlive account. You should have set up these permissions when you were creating your Attendance Checker.
Step 3: Selecting Your Event / Session
Here, you'll see the different options that you have associated with this event. It might just be your master list of guests if you're only doing a main check-in for your overall event but if you have session check-ins, here is where you'd be able to select the session that you need.
Read more about session check-in here.
Step 4: Selecting Your Printer (Optional)
On the same screen as Step 3 when you are selecting your event/session, you'll also be able to select your printer if you would like to print badges upon check-in.
Apple AirPrint
All you have to do for this is to make sure that your printer and your device with the check-in app are running on the same WiFi network. This should make the printer available to you as a selection in the app.
Brother Mobile Printer
Connect your printer to the same WiFi network as the device with the check-in app. You can do so with the help of Brother's Wireless Device Setup Wizard (MAC) or by following this step-by-step guide (Windows). Once that is done, your printer will be available to you as a selection in the app.
Google Cloud Print
If you have already retrieved the Google Cloud access token by authorizing it when setting up your badging settings (which you should have), you will be able to select your printer from the app without having to do anything else!
You're good to go!
That's pretty much it! Your app is now ready to use. Do note however, that if you're using the QR code check-in method, having stands so that your device is tilted at an angle makes it much more effective. Light that glares directly onto your device or camera can make the QR code a little more difficult to scan.
If you are unsure how to use the app, hop on over here to find out how it works, and how you can access the live attendance data or register walk-in guests with it!